 Help Centre
StarBook Mk V / Mk VI — Disassembly Guide
This guide explains how to safely disassemble your StarBook Mk V or Mk VI for component access, cleaning, or part replacement.
⚠️ Important:
You’ll need a PH0 Phillips screwdriver and thermal compound (if removing the mainboard).
Screw lengths vary by component — keep each set separate and label them if possible.
Before you begin, place your laptop on a soft, protected surface to avoid scratching the anodised finish.

1. Remove Outer Screws
Remove the 2 long Phillips screws located in the top corners of the backplate.
2. Remove Remaining Screws
Remove the 8 short Phillips screws securing the rest of the backplate.
3. Remove the Backplate
Gently lift the backplate away from the chassis.

4. Remove the Battery
-
Unscrew the 5 Phillips screws securing the battery.
Note: The centre-right screw is intentionally missing.

-
Disconnect the battery connector carefully.


5. Remove the SSD
Unscrew the retaining screw and slide the SSD out of its slot.
6. Remove Memory Modules
-
Press the silver clips on either side of the memory slot outwards to release the module.
-
Gently slide it out.

Repeat for the second memory module.
7. Remove the Wireless Card
-
Lift the plastic antenna cover, then detach both antenna cables carefully.


-
Remove the retaining screw and slide out the wireless card.

8. Remove the I/O Board
-
Lift the ribbon cable clamp to release the cable.

-
Unscrew the 2 Phillips screws securing the board, then lift it out.

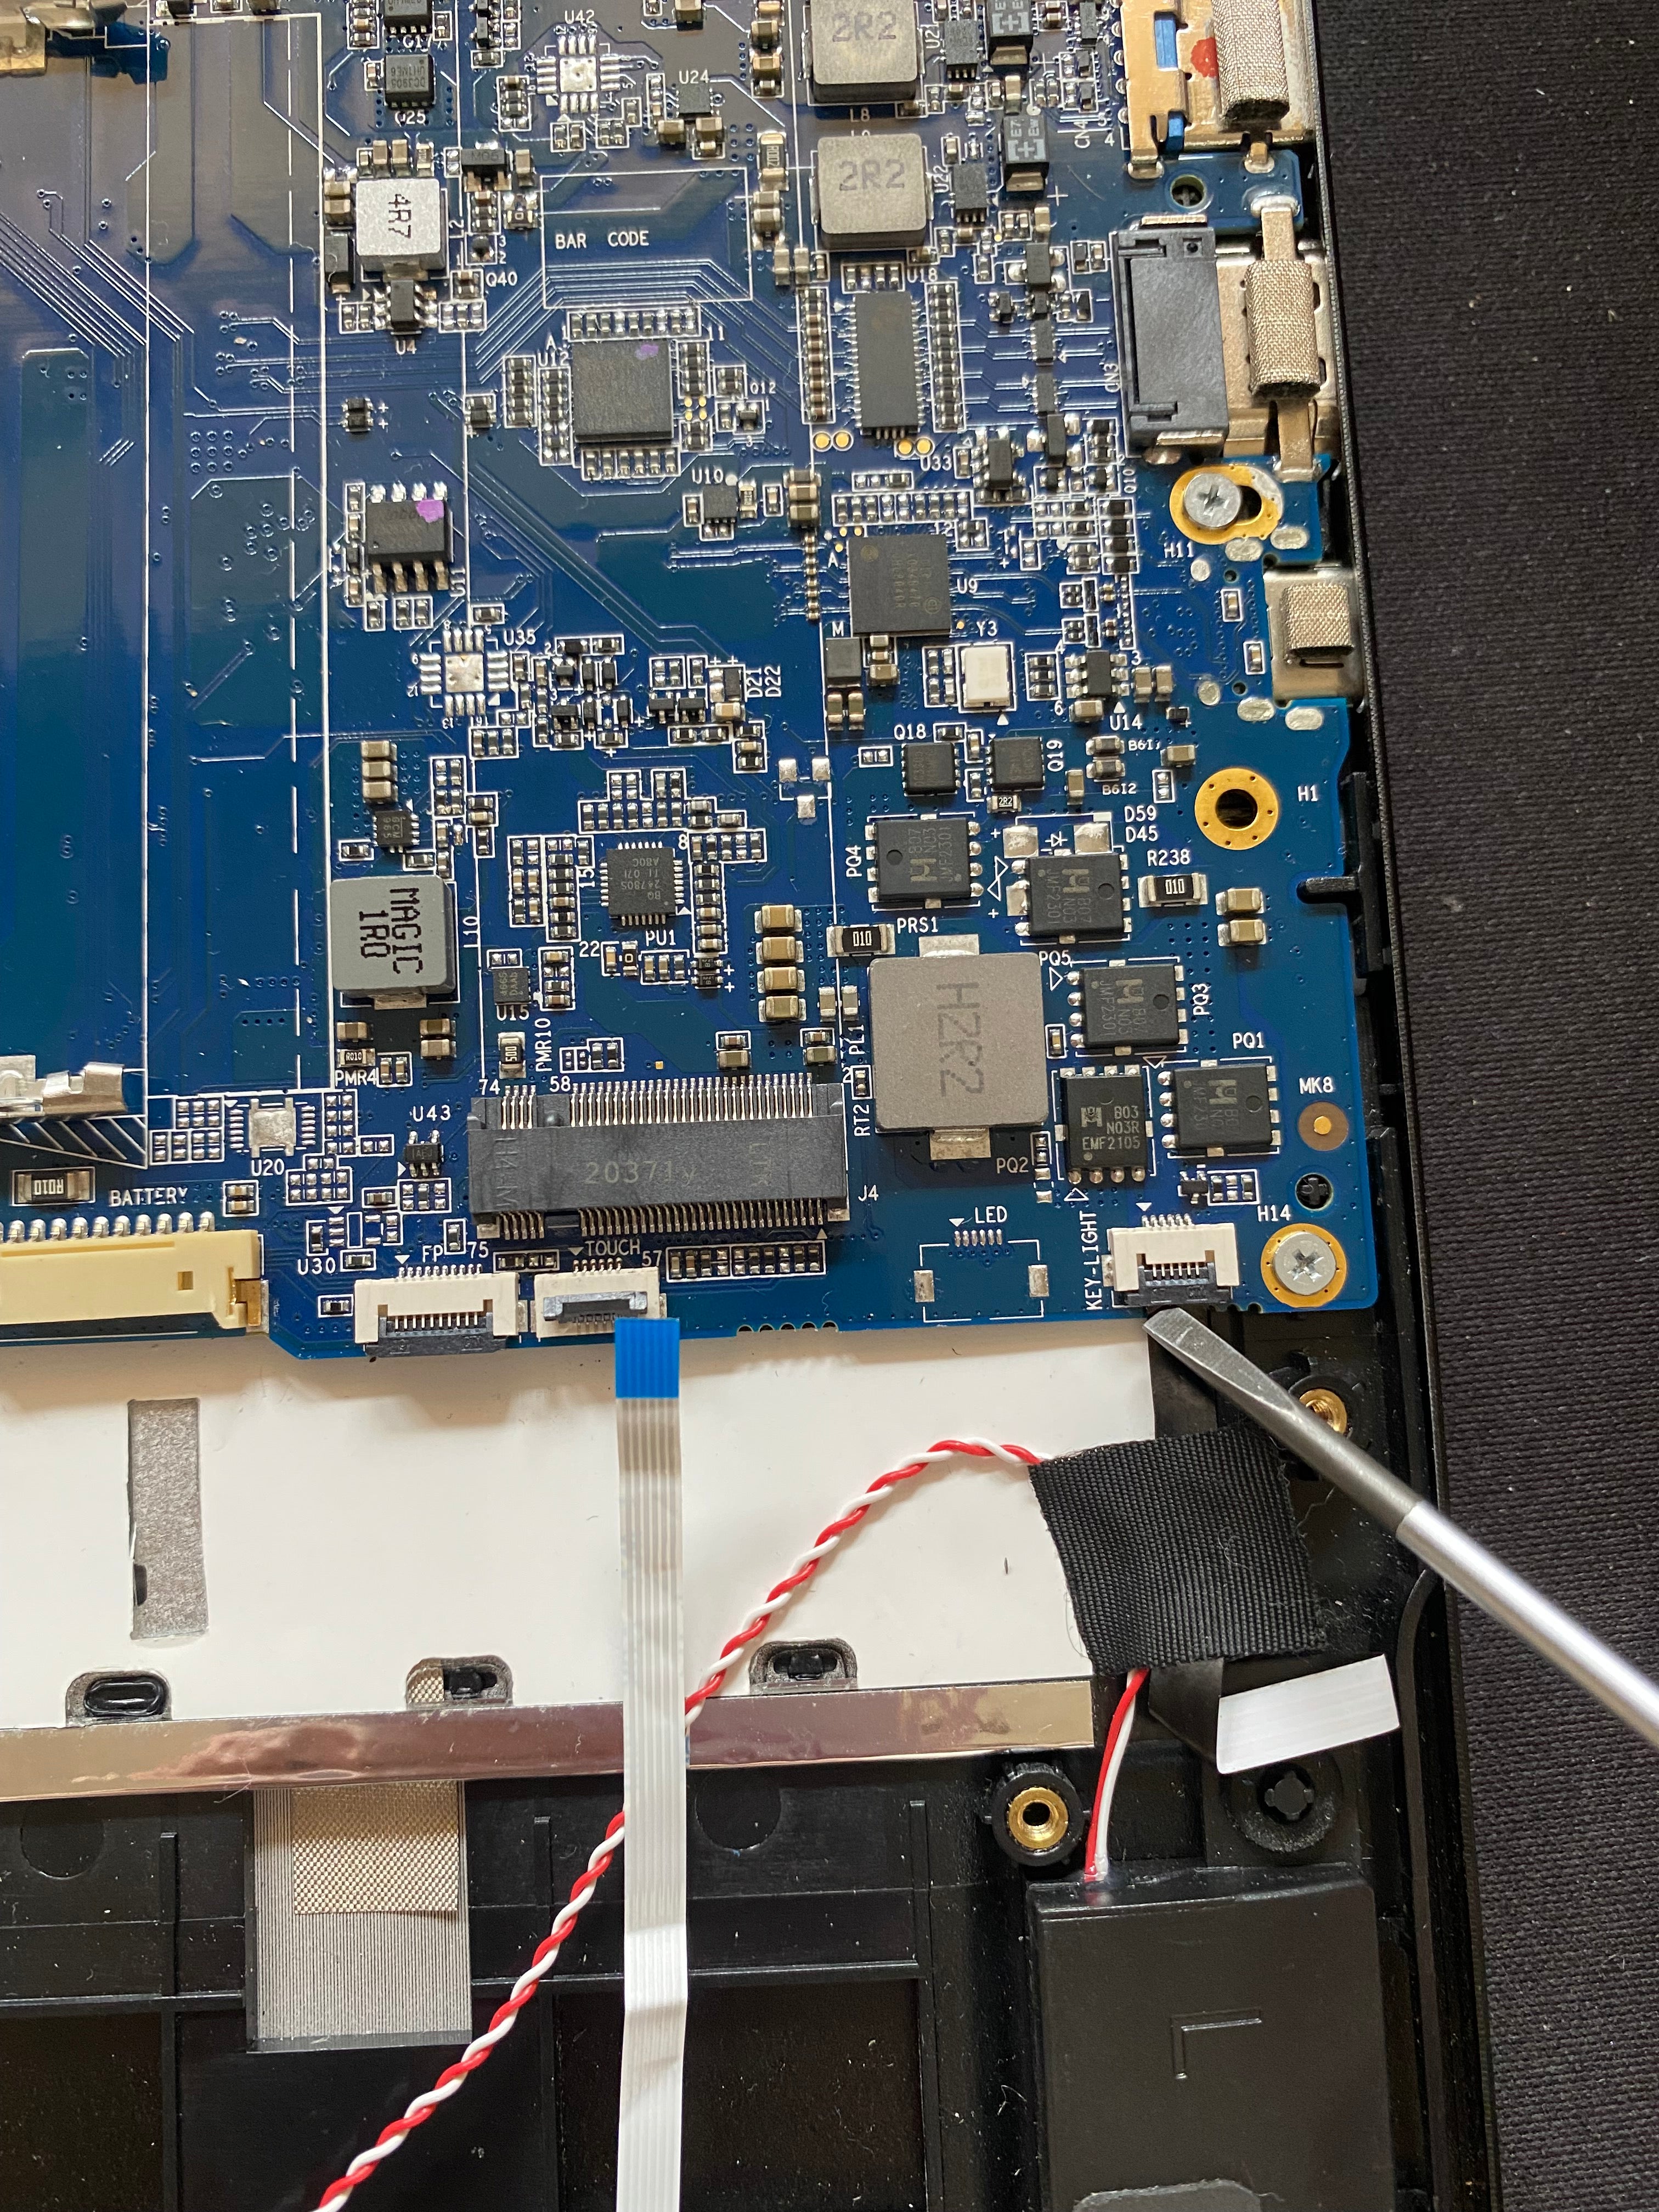
9. Disconnect the Screen
Lift the screen connector clamp to detach the display cable.
10. Disconnect Cables from the Mainboard
Detach the following connectors:
-
I/O Board
-
Keyboard and keyboard backlight
-
Speakers
-
Trackpad
-
Fingerprint Reader (Mk VI only)
I/O Board:
Touchpad: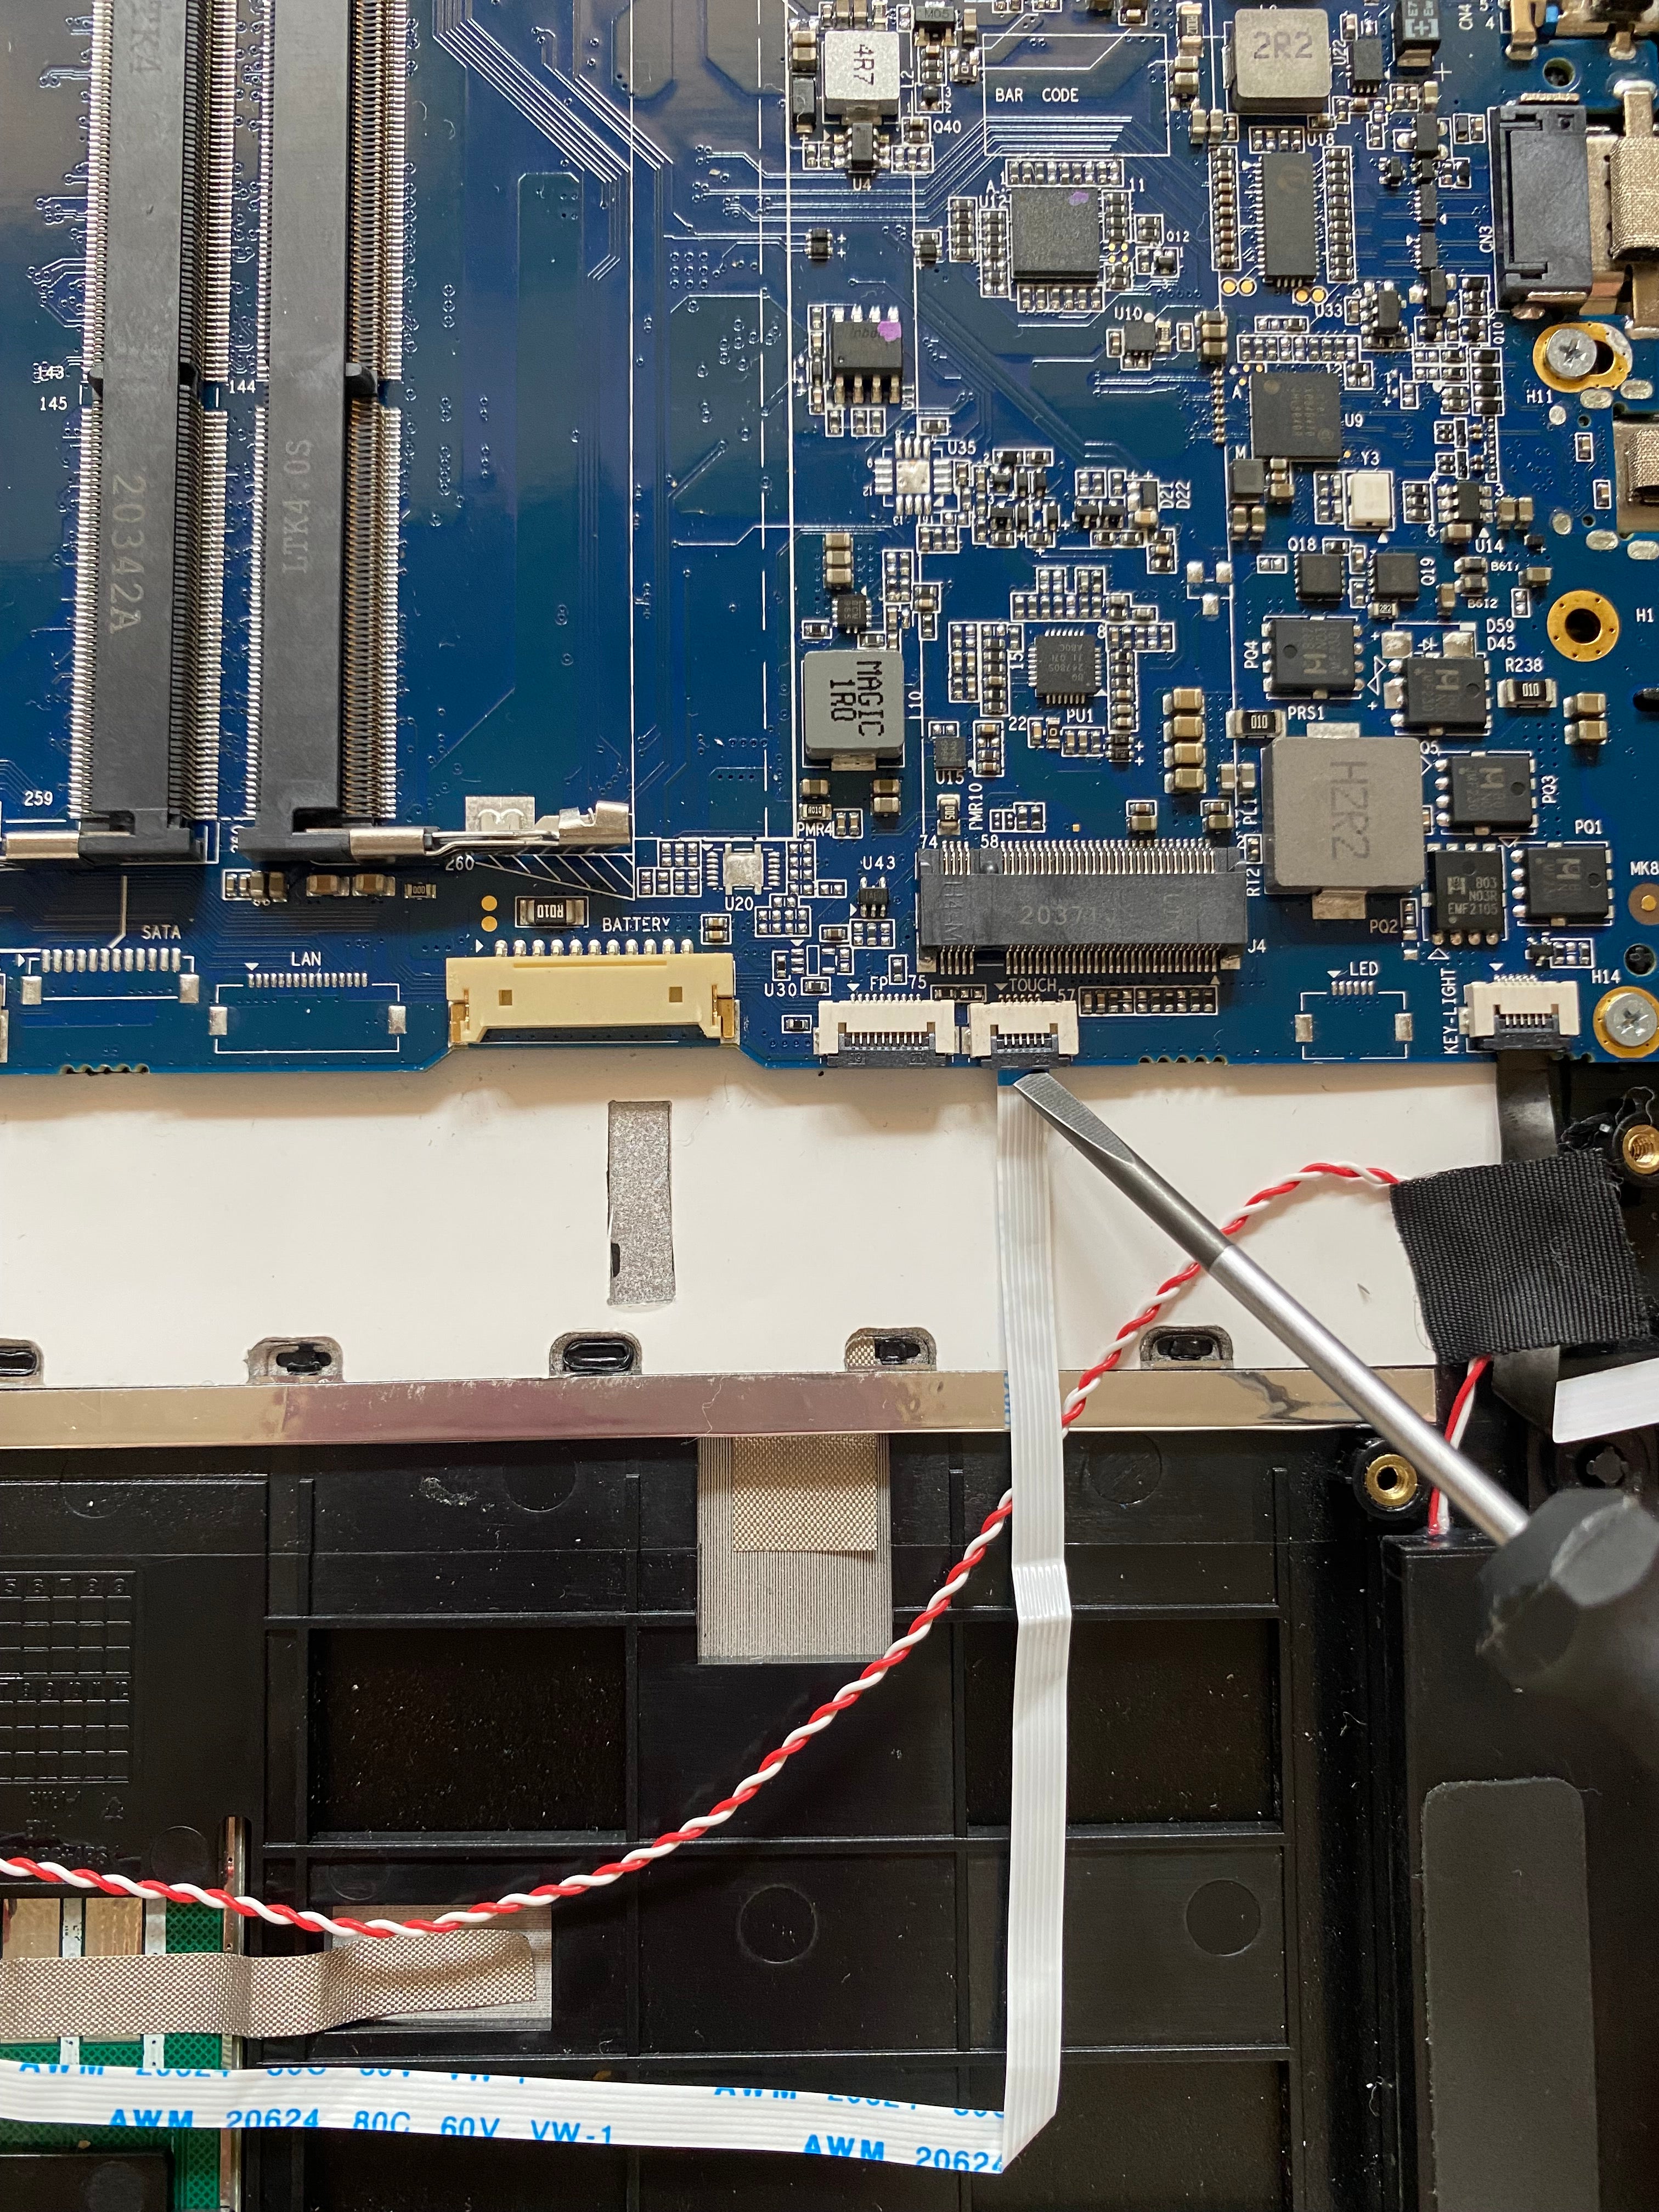
Speakers:
Keyboard & Backlight: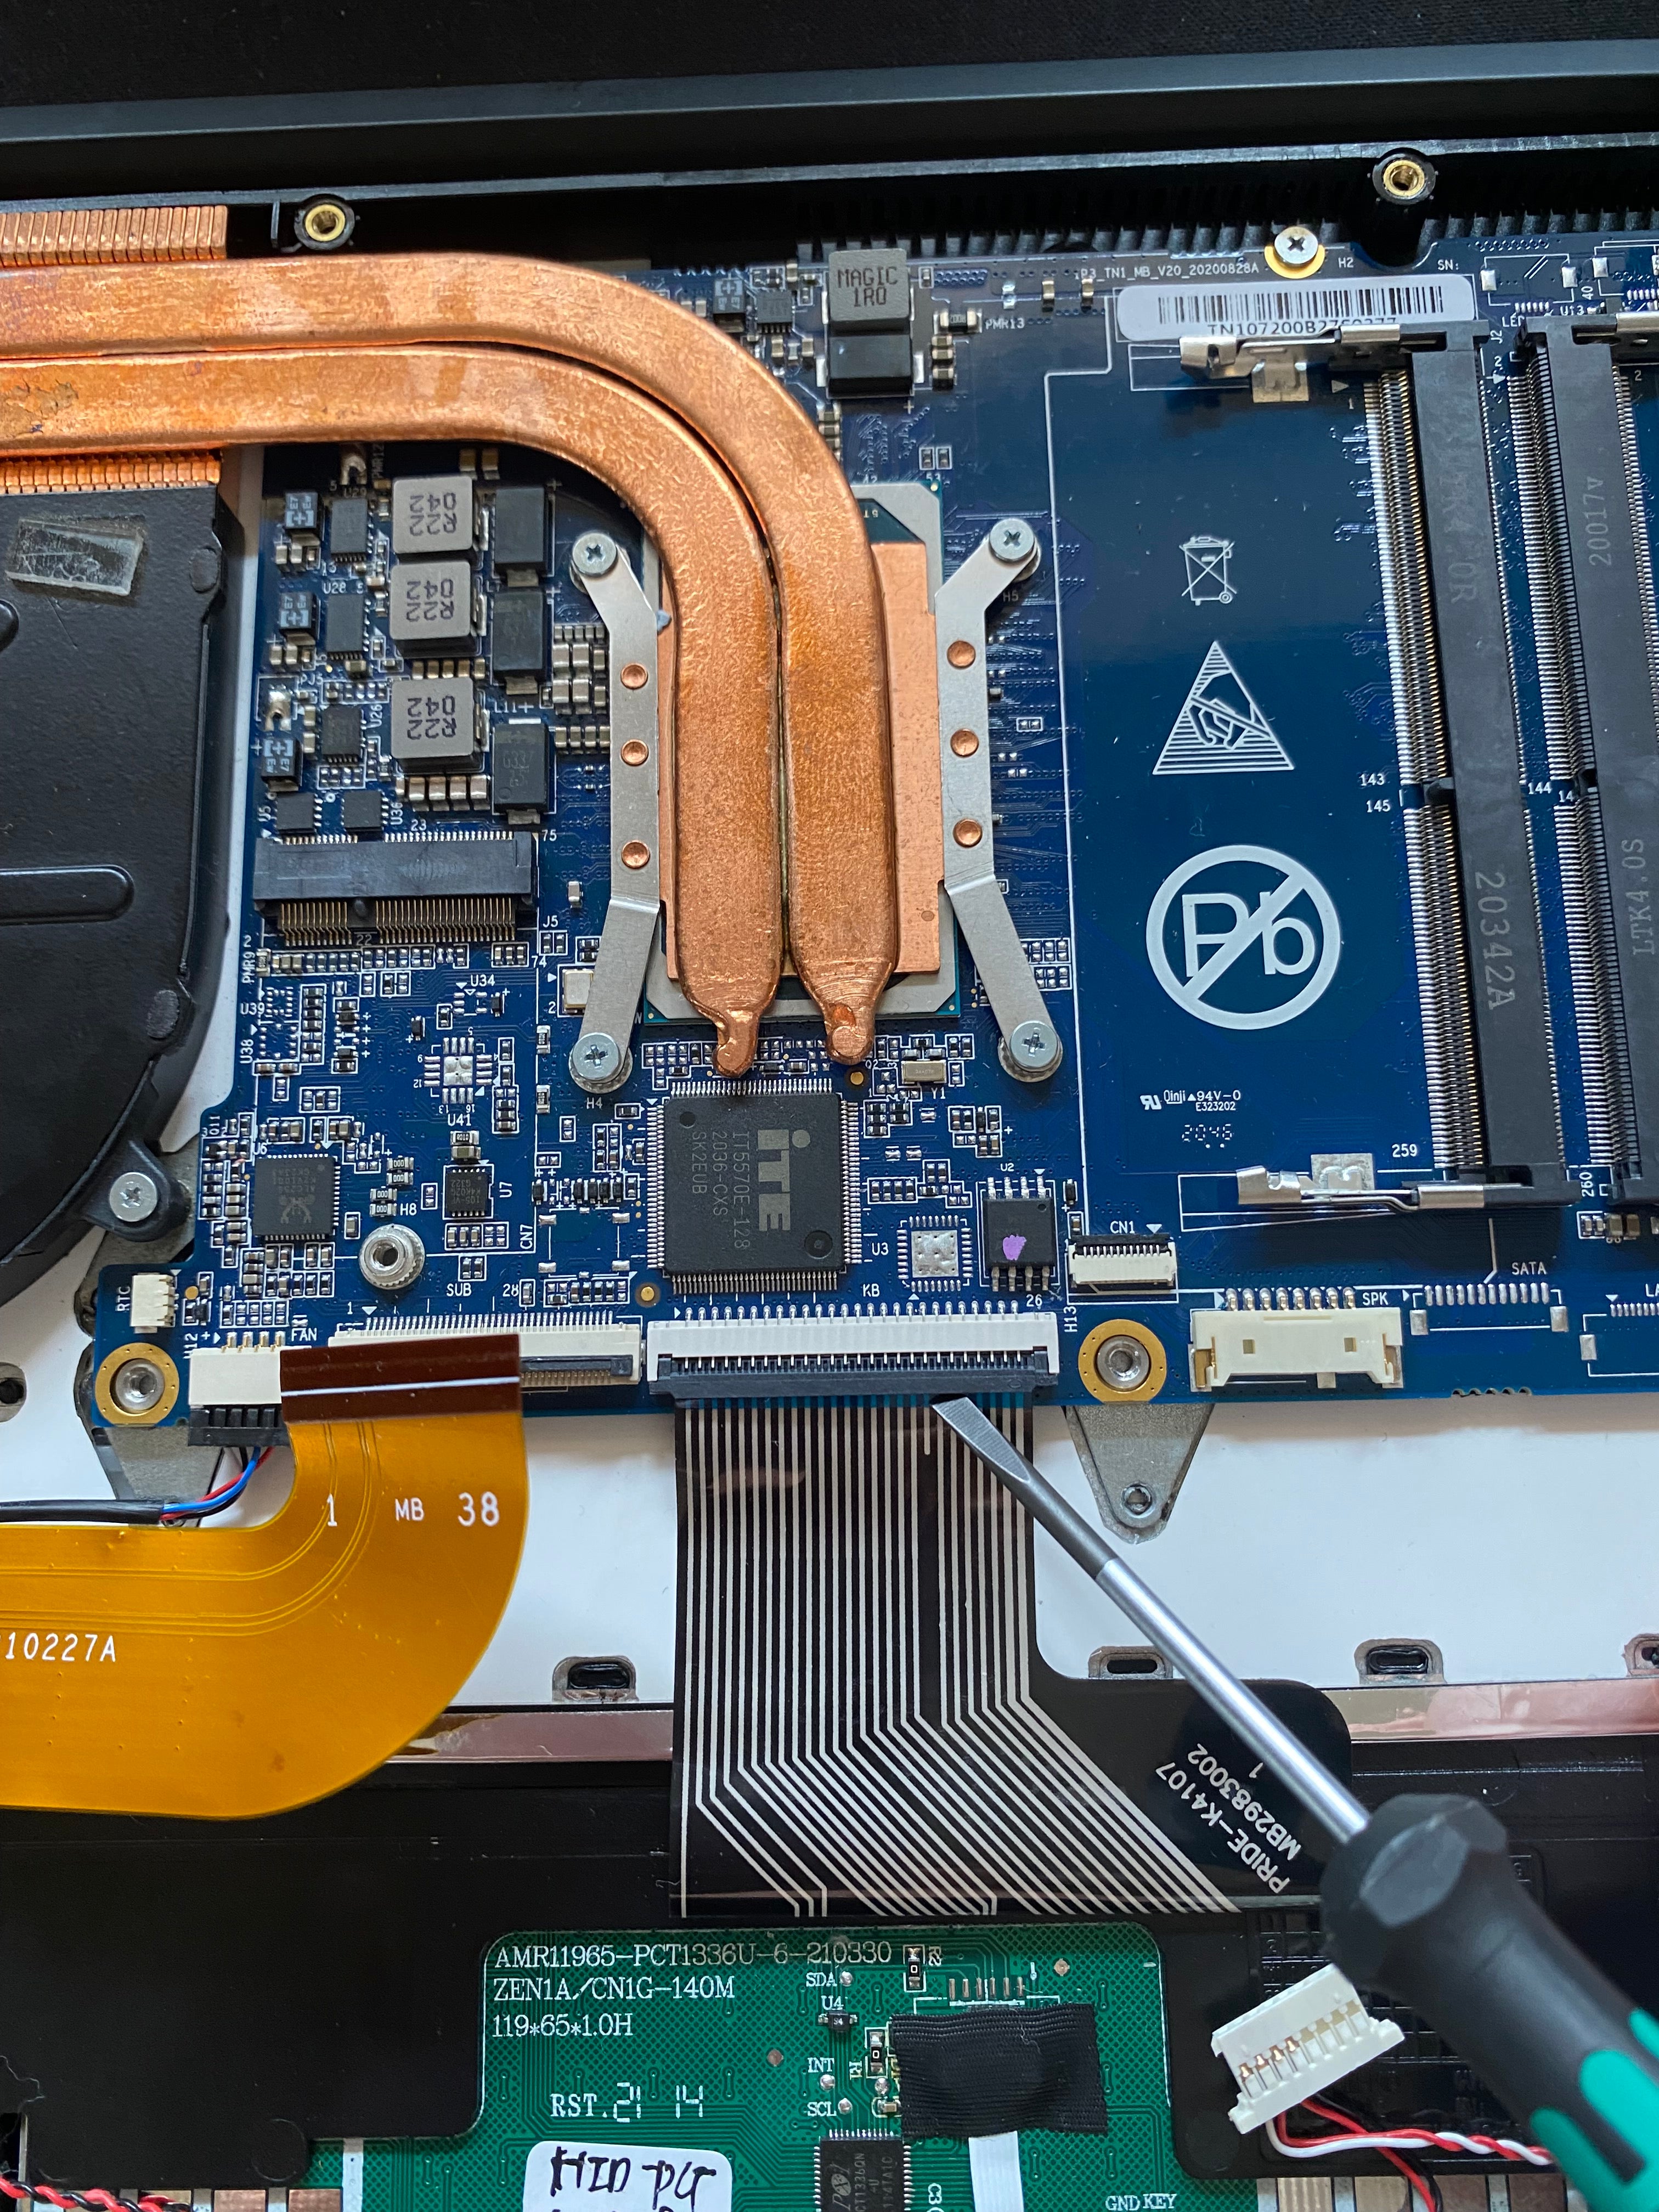
11. Remove the DC Jack
-
Remove the 2 silver screws securing the DC Jack shield.
-
Disconnect the DC Jack cable from the mainboard.

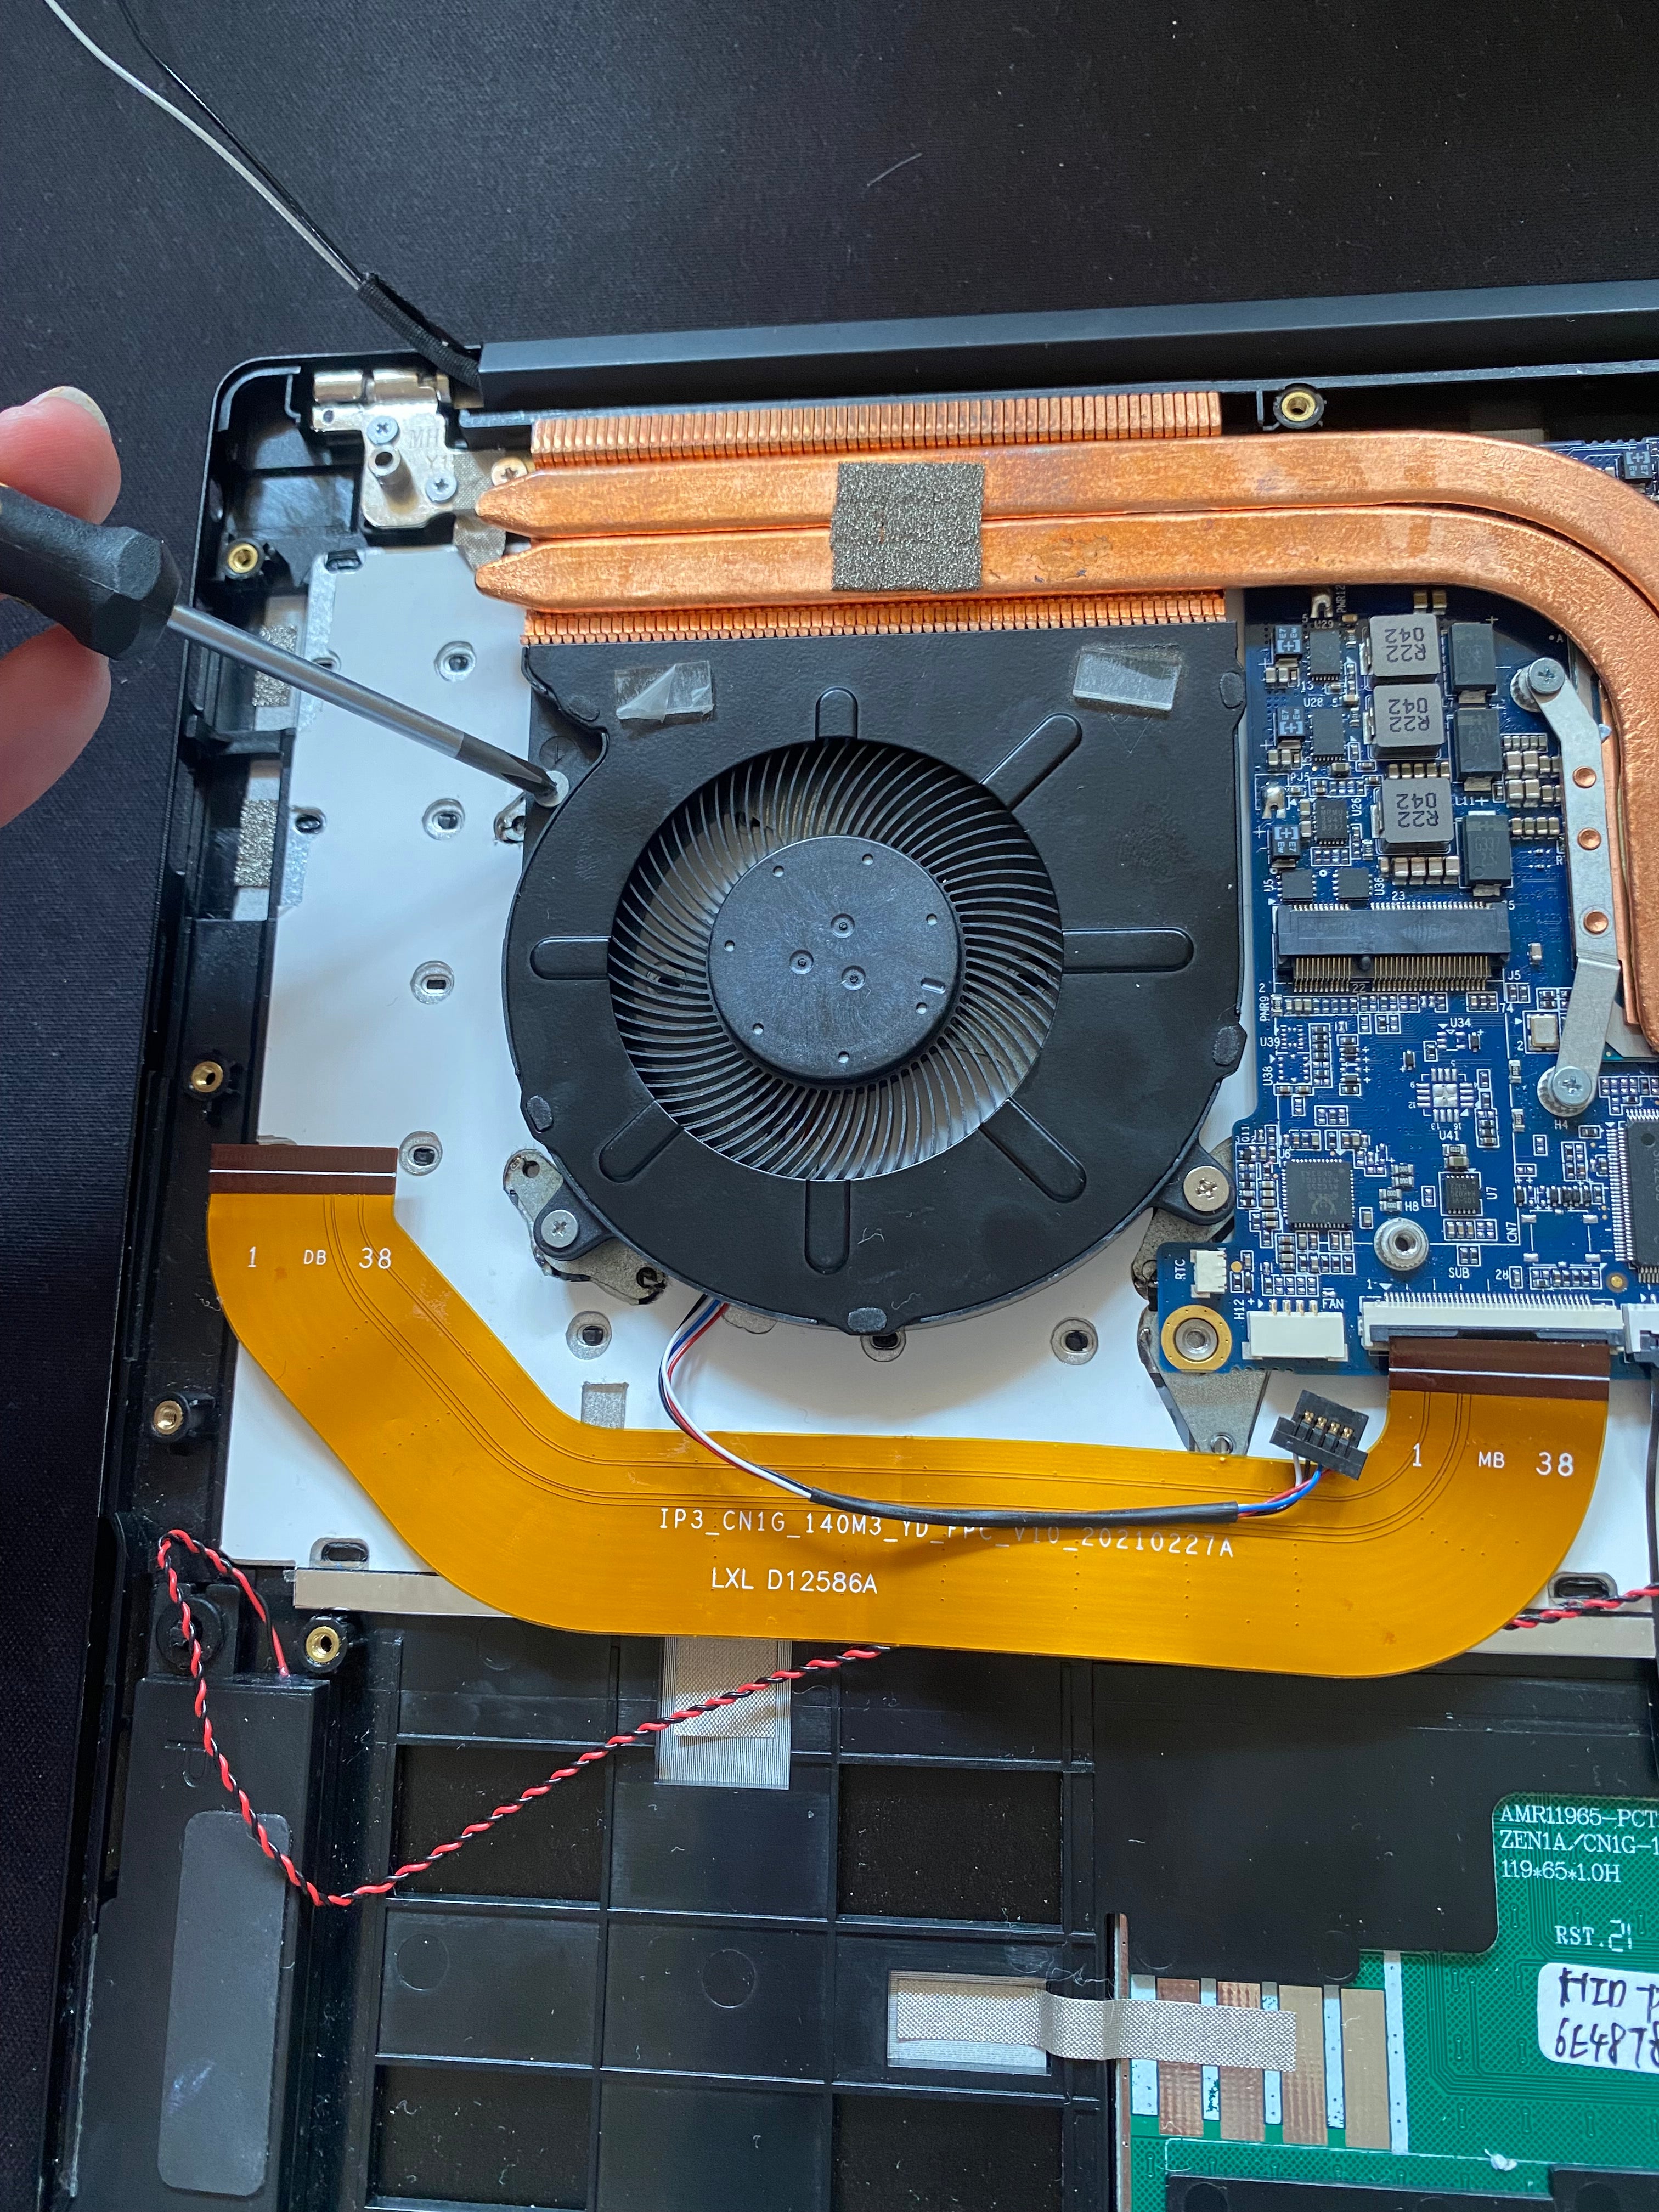
12. Remove the Fan
-
Disconnect the fan cable from the mainboard.

-
Remove the 3 Phillips screws securing the fan and lift it out.

13. Remove the Heatsink
Remove the 4 short Phillips screws holding the heatsink, then lift it off the mainboard.
These screws are shorter than other silver screws.


14. Remove the Mainboard
Remove the remaining 4 Phillips screws around the edge of the mainboard and lift it out of the chassis.

15. Remove the I/O Ribbon Cable
Detach the ribbon cable from the chassis.
16. Remove the Display Assembly
-
Remove the 4 Phillips screws from the left hinge.

-
Remove the 4 screws from the right hinge.

-
Lift both hinges to a 90° angle to allow the chassis to clear them.


-
Carefully lift the chassis to separate it from the display array.

17. Disassembly Complete
Your StarBook disassembly is now complete.
18. Reassembly
Reassemble by reversing the above steps.
⚙️ Note on Thermal Compound:
When reattaching the heatsink, clean off the old thermal paste from both the CPU and the heatsink using a lint-free cloth.
Apply a small, fresh amount of thermal compound to the centre of the CPU before reinstalling the heatsink.

