Booting with a Previous Kernel
If your system fails to start after a kernel update, you can try booting with an earlier kernel version. Here’s how:
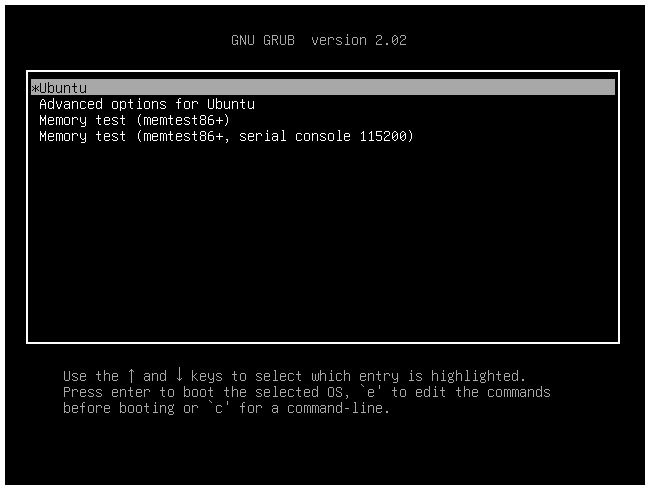
1. Boot into GRUB
Turn on your laptop and repeatedly tap the Esc key as it starts up.
Stop pressing it once the Star Labs logo disappears — this should bring up the GRUB menu, as shown below:
2. If You Press Esc Too Many Times
If you see the screen below, you’ve gone one step too far.
At the GRUB command line, type:
normal
Then press Enter, and tap Esc again until the menu appears.
If that doesn’t work, simply restart the laptop and repeat step 1.

3. Select a Previous Kernel
Use the arrow keys to highlight “Advanced options for Ubuntu”, then press Enter.
You’ll see a list of available kernels. When troubleshooting, it’s usually best to choose the oldest version (listed near the bottom) — just make sure to select one without “(recovery mode)” at the end.

4. Boot the Selected Kernel
Press Enter to start your laptop using the kernel you selected.